February 26, 2012

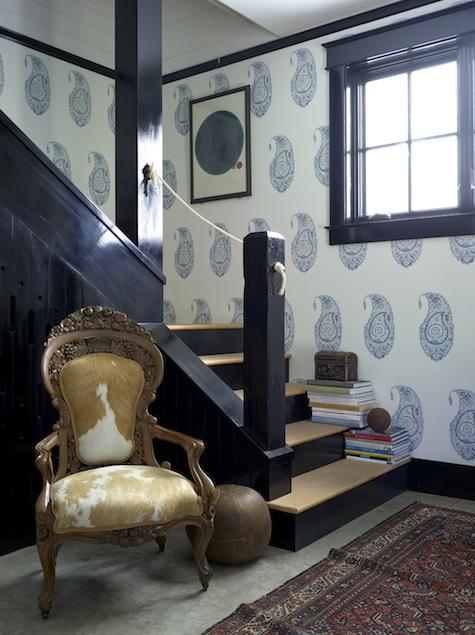
Fabric Faves: Les Indiennes

I know I've mentioned before my love of block-printed fabrics. I believe it adds a handmade touch to a room and an exotic feel. They are so versatile- can be used in a modern or traditional setting. Les Indiennes has beautiful simple patterns in earthy colors, blends right in any setting.
photo
photo
photo
photo
Wow-- I'm seeing so much Navy...maybe my #2 color of the year. 

February 17, 2012

I Spy Cool Art: Jill Ricci

Thanks to Pinterest, I recently spotted my new favorite artist-- Jill Ricci. If I were an artist-- this is what I would hope to conjure up. To me her art speaks of a bohemian, gypsy dreamland displayed in a way that keeps you looking for more. I love how the patterns bring continuity and order to the randomness and layers. As she puts it "I want the pieces to evoke an old wall in Morocco, a Renaissance Church, a NYC subway wall and Malibu Barbie all simultaneously existing on one canvas." I think she has accomplished just that.
I spy Circles pattern
Kinda looks like Granada pattern
Reminds me of Trellis pattern
Lovely.

February 11, 2012

Cappuccino and Cases

I had so much fun having a photo shoot with my cases and my lovely model-- Kris. Her and her cute butt are available for hire! :) Anyway-- these shots didn't make it in the Joss & Main Lookbook, so I thought I'd share. Most of the pictures in the Shop are digital, so it's nice to see some live shots. We got all hyped up on cappuccinos and snapped away. I had a few people tell me that the coffee rings around the cups looked dirty, but I insisted on not photoshopping it out because that's the sign of a good cappuccino-- when it's so thick that it sticks to the sides of the cup! Mmmmmm....
Personalized Chevron iPhone Case
iPhone Case with Initial
Customized Moroccan Pattern iPhone Case
Fate intervened with these amazing painted doors. On New Year's Day, I was desperate for a good cappuccino, so I went to my local spot- Hi-Hat (YUM- they do it right!) but it was closed, so I hit Broadway Cafe (equally delish). The place was packed, so I had to park down the street. Coincidentally, I parked right in front of a Moroccan Restaurant I had never noticed before-- and you know how I love all things Moroccan. And check out these doors-- cool, right!? 

February 10, 2012

Valentine's Banner

I'm sure I've mentioned before that I live in a small house-- it's a good old house, but our living space is not huge. It definitely forces me to get creative with all of our "stuff". Unless they are on the wall, I don't have any surface area to put out little decorative items. That's mostly fine by me, because I like to keep things simple and anything that's out should usually serve a purpose. Anyway-- I don't decorate for the holidays much. Partly because I don't have the time/energy/will to lug things from the basement, put them out, then lug them back downstairs 2 weeks later. And I've already mentioned the lack of places to put stuff. My kids get so excited about decorating for the holidays though. When my son came home from school and saw the Valentine's Banner he got so excited. I swear his eyes then went straight to the little Christmas tree on top of our armoire that's still out. Yes, there is still one remaining Christmas decoration out! And he totally spotted it. That was yesterday-- and yep, it's still there right now. I'll get to it...

In the meantime, thought I'd share this EASY EASY Valentine's Banner, that fits in any small space! Our fireplace mantle is usually the spot for any seasonal decorating, but you could hang this in a window or on your front porch. The paper is cut from grocery store paper bags. I used scallop scissors along the bottom. On the back it's folded over and taped to allow room for the twine. The letters are printed in a dark red and then cut out and glued on the paper bags. The font for the letters is Chipperfield and Bailey, found here. The decorative heart that I used as a spacer is KR All Heart, found here. It would also be cute to do XOXO. So simple, and cost NOTHING.


Happy LOVE day!

February 04, 2012

DIY Zigzag Homasote Idea Board

DIY Bulletin Inspiration Idea Board

I've gotten a few emails asking about the bulletin board from the KCH&G magazine photo shoot. This was a fun and rewarding project. A little prep and research paid off, while trial and error finished the job. I wanted something BIG, and didn't want little bulletin boards put together. When I was a teenager, I had a whole wall of bulletin board, and it was so cool. Now that wouldn't work on my walls because they are textured, so I did some digging and found out about Homasote. Homa-WHA???? you might be asking. The best part of this find is that the Homasote makes this an eco-friendly project because it's made from recycled newspapers! Offices and art studios often use it as dry wall because you can easily put a push pin in it. Some say that you can find Homasote at Home Depot or Lowe's, but my Lowe's did not have it. I  found it easy through the Homasote site and my local lumber yard (Schutte Lumber down on Southwest Boulevard, for any locals out there wondering). It comes in 4 x 8 sheets, and I had the lumber folks cut it down to 4 x 4 feet. I wish I could have kept it 4 x 8 because that's a great size, but my office isn't that big, and 4 x 4 is plenty big. I think it was like 40 bucks.

I decided I just couldn't let it be plain, so I had to patternize it. Just made that word up-- patternize. Why would I want to patternize it when you won't see it with all the stuff on it? Good question. Anyhoo-- I decided on zigzag pattern because I thought it would be bold and easy. I did a little research because I didn't know if I could get solid lines with painters tape on an uneven surface like Homasote. It's got quite a bit of texture to it. I found this great article that explains how to get a solid line. The trick is after you tape everything, you repaint over the tape line so that there's an even surface when you use the opposite color. So, I primed it, then painted the whole thing white, then put the painters tape on, then painted along the tape seams with WHITE paint. The paint seeps into the grooves between the painters tape. THEN, you paint the grey on top of the white, and that is how you get smooth lines. If this doesn't make sense, try reading the article. I was amazed when I took off the tape to find perfect lines. I think I just had one little spot that needed touching up. This is a great trick for textured walls or any surface that is uneven. I'm not going to even try to explain how I did the zigzags, but here's my sketch:

Here's some of the process:
I used 2 different widths of tape, so it looks a little weird.
Here you can see where I painted over the seems in white.
And voile...

You are probably wondering how I hung this sucker, right!? When I read about Homasote, people described it as light. While it may be relatively light, when it's in a 4 foot by 4 foot sheet, it's pretty darn heavy. I could lift it easily, but to hang on a wall is another story. Here's where the trial and error came in. I first tried industrial strength Velcro tape. The guy at the hardware store told me he put a flat screen TV up with it. Well, apparently the Homasote board is heavier than a flat screen. It lasted about 3 days then fell. I had nightmares of being in the middle of my KCH&G photoshoot and having the thing fall. So, I added these thingies, just screwed them in:

with some of this: 
I think this is speaker wire. Random, but it worked.
I first tried using that metal wire that comes with those kits that you hang pictures with,
but it tore in half when I hung it. 
I also added the industrial strength Velcro. My walls are textured, so I think the Velcro may have worked by itself if my walls were smooth. It's been several months, and it's still hanging! 

More on the office chair re-do and the easy valances coming soon!